You use paper bowls every day, but assume they are simple to make. This overlooks the complex engineering needed for them to hold hot soup without leaking or failing.
A paper bowl is made in four main stages. It starts with high-grade raw paperboard, which is then printed, cut, formed by high-speed machines, and finally passes through strict quality control.

Every time I walk through my factory floor, I see a process that looks like magic but is actually pure engineering. We start with a massive, heavy roll of paper and, through a series of precise, high-speed steps, turn it into thousands of perfectly identical, strong, and reliable bowls. It’s a journey that combines material science, mechanical precision, and detailed human oversight. Let me take you on a tour of how we bring a simple paper bowl to life, from the forest to your feast.
What Raw Materials Are Used to Make a Paper Bowl?
You assume all paper is the same. This can lead to choosing a supplier that uses cheap, weak materials, resulting in soggy bowls and unhappy customers for your business.
The process starts with strong, food-grade paperboard (like SBS) for the body. This paper is laminated with a waterproof lining, either standard PE plastic or eco-friendly PLA bioplastic.

The entire performance of a paper bowl depends on its foundation. If we start with the wrong materials, no amount of machine magic can save the final product. That's why this first step is so critical. The main body of the bowl is made from a material called Solid Bleached Sulfate (SBS) paperboard. As an engineer, I choose this material for three reasons: it's incredibly strong, it's very stiff so it won't bend or crush easily, and it's pure, making it perfectly food-safe. We also exclusively source our paperboard from responsibly managed, FSC-certified forests.
The second key ingredient is the protective lining. This micro-thin layer is what makes the paper waterproof. Without it, hot soup would turn the bowl into pulp in minutes. We apply this coating to the giant paper rolls before anything else happens. My clients have two excellent choices:
| Lining Type | Source Material | Key Benefit | Best For |
|---|---|---|---|
| PE (Polyethylene) | Petroleum-based polymer | The industry standard for reliability and cost-effectiveness. | All-purpose use for hot and cold foods. |
| PLA (Polylactic Acid) | Plant-based bioplastic (from corn starch) | Commercially compostable and eco-friendly. | Brands focused on sustainability. |
How Does Your Brand's Design Get Printed on the Bowl?
You have a beautiful logo, but you're worried it will look blurry or inconsistent on a curved bowl. A poor print job makes your entire brand look unprofessional.
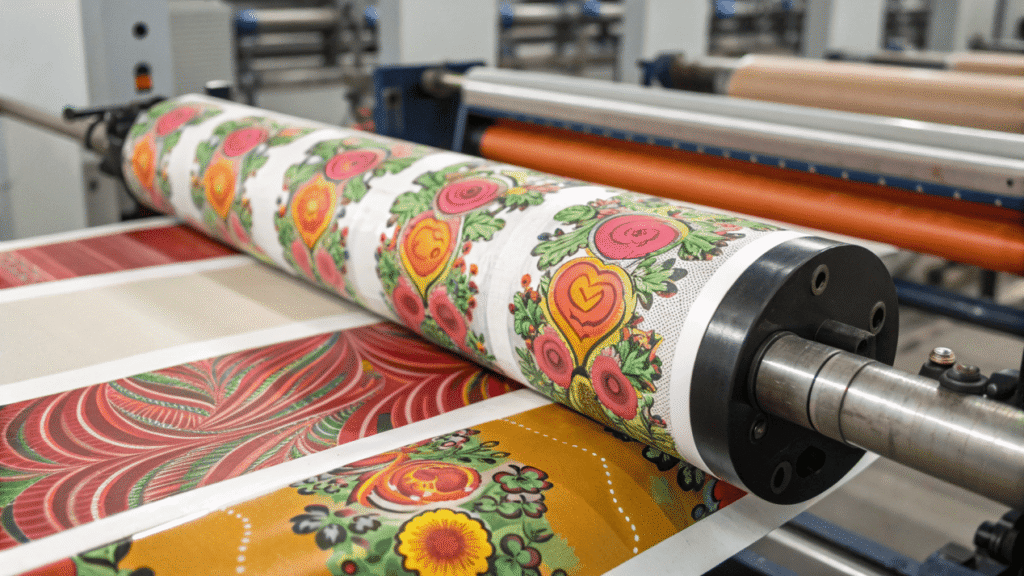
We print your design on the huge, flat rolls of paperboard before the bowl is ever formed. We use high-speed flexographic presses and food-safe inks for a clear, vibrant, and consistent result.

This is where the bowl gets its personality and becomes a marketing tool for your business. A common question my clients ask is how we print so clearly on a curved object. The secret is that we don't. The printing happens at the very beginning of the process while the paperboard is still a massive, flat roll. These rolls are fed into our high-speed flexographic printing presses. You can think of flexography as a highly advanced version of a rubber stamp. We create flexible printing plates with your design on them. As the paperboard flies through the machine, these plates transfer fast-drying, food-safe inks onto its surface with incredible precision.
Printing at this stage is the only way to guarantee quality and consistency. It ensures your logo is sharp, your brand colors are vibrant, and every single bowl in a run of 50,000 looks exactly the same as the first one. Once the printing is complete, the rolls are ready to be transformed.
How Does a Flat Piece of Paper Become a Leak-Proof Bowl?
It seems impossible that a flat sheet can be turned into a strong, 3D bowl that holds liquid. You worry about leaks, especially from the bottom seam where it all comes together.
It's a four-step automated process: A machine die-cuts the body, seals the side seam into a cone, inserts and seals the bottom disc, and finally curls the top rim for strength.

This is the heart of my factory, where the real transformation happens. A series of perfectly synchronized, high-speed machines turns the printed paper into a finished bowl.
Step 1: Die Cutting the Body Blanks
The large, printed roll of paperboard is fed into a die-cutting machine. Think of this as a very fast, very powerful cookie cutter. A sharp die punches out fan-shaped pieces of paper. These flat "body blanks" will become the walls of the bowl.
Step 2: Sealing the Side Seam
Each flat body blank is then automatically picked up and wrapped around a heated, cone-shaped mold called a mandrel. A blast of super-hot air or an ultrasonic vibration is applied to the overlapping edge of the paper, instantly melting the PE lining and fusing the seam together. This creates a cone with an open top and bottom.
Step 3: Inserting and Sealing the Bottom
At the same time, a separate machine is punching out perfect circles from another roll of paperboard for the base. As the cone shape moves down the line, a bottom circle is placed into it. The cone is then pushed into another mold where the bottom edge of the wall is heated, folded inward, and pressed with extreme pressure against the bottom disc. We call this process "knurling," and it creates the strong, mechanical, leak-proof seal that is the most critical part of the bowl's structure.
Step 4: Curling the Rim
In the final forming step, the open top edge of the bowl is rolled tightly outward to form a smooth, rounded rim. This isn't just for looks. The curled rim provides a huge amount of structural rigidity to the entire bowl, preventing it from being easily squeezed or misshapen. It also creates a perfect surface for a lid to snap onto securely.
How Do You Ensure Every Single Bowl Is Perfect?
You are ordering thousands of bowls and worry about defects. A single leaking bowl can ruin a customer's experience and damage your reputation. This is a big concern.
Quality control is continuous. Machines have sensors to detect errors in real-time. Our technicians also pull samples every hour for manual leak tests, and every bowl is visually inspected before packing.

A finished bowl is useless if it's not perfect. That’s why quality control is not the last step in our process; it is built into every step. My promise to my clients is reliability, and this is how we deliver it.
In-Process Automated Checks
Our modern forming machines are incredibly smart. They are fitted with optical sensors that can detect things the human eye might miss, like a slight misprint in the color, a misaligned seam, or an improperly formed rim. If a machine detects a fault, it can automatically reject that specific bowl without stopping the entire production line.
Hourly Manual Inspections
Technology is great, but it can't replace human expertise. Every hour, my trained quality control technicians walk the line and pull a set of finished bowls. They take them to our testing station where they perform a series of checks. They fill them with hot water colored with blue dye and let them sit on white paper to check for even the smallest leak. They try to pull the seams apart to test their strength. They check the print quality under a magnifying glass. This constant manual verification ensures our machines are always running perfectly.
Final Inspection and Packing
Before the bowls are packed, they pass under bright lights for a final visual inspection. They are then automatically counted and stacked by a machine, sealed into sanitary plastic sleeves to keep them clean, and packed into sturdy cardboard cartons. This guarantees that when you open a box of our bowls, every single one is ready to serve your customers safely and reliably.
Conclusion
From a roll of paper to a finished bowl, the process is a perfect blend of material science, precision engineering, and a constant focus on quality.